Rails Helpers typically are a source of confusion for new and not that new Rails developers. One of the most common questions I get is… what kind of code should go into the app/helpers/ folder?
In todays post you will learn how should you use helpers and you will see them in action with a blog application that we will create at the drop of a hat.
Let’s focus on the theory first and finish with the example.
What are Rails helpers used for?
Rails provides out of the box lots of helpers for working with assets, dates, forms, URL generation, sanitization and formatting among others.
The purpose of these helpers is to extract complicated logic or reusable functionality from your view templates. With the same idea in mind, the Rails guides encourage you to create your own helpers. Where should that code live within your Rails application? You guessed it. Under app/helpers/.
Looking into app/helpers
The directory /app/helpers/ contains the modules that implement your custom helper methods.
If you take a look to a default Rails application you will notice that there is always an ApplicationHelper module. The ApplicationHelper module typically contains the helper methods that will be used across most of the templates of your application.
As you can imagine the ApplicationHelper is not the only helper module you will have in your application. As soon as you run the rails generate scaffold command to create a new resource, you will notice that Rails adds a new helper module to /app/helpers/. For example, if you create a User resource and you need a method to display and format some user properties in your templates, then the UsersHelper module would be the place to put that code.
Helper modules structure
If you paid attention you will notice I recommended you to write application wide helpers in ApplicationHelper. On the other side, I said helpers related to just one specific resource (i.e. User) should be in the resource’s specific helper module (i.e. UserHelper). I think this is a good practice since it helps you guessing where your helper methods will be when reading the code later.
In previous versions of Rails this used to be even more restrictive. If you decided to write a method inside the PostsHelper module, that method was only available to Post related templates. Nowadays that behavior is not longer enforced and helpers are available to all templates by default.
If nonetheless you want to enforce that behavior again, you could set the following configuration. Although I think such restriction is not necessary in most cases.
|
1 2 3 4 |
# config/application.rb class Application < Rails::Application config.action_controller.include_all_helpers = false end |
Rails helpers in action
Now that you have a solid basis on what helpers are and when you should use them let’s see them in action.
I will create a typical Rails example blog application with two resources: Author and Post. By the time of this writing the Rails version I used was Rails 7.
Since Posts will use ActionText for the content I need to install it by running the following command within the blog’s application directory:
|
1 |
$ bin/rails action_text:install |
To create the Author and Post resources I then use the scaffold generator so that helper modules are automatically added.
The Author will have a name (string) and a unique email (string):
|
1 |
bin/rails g scaffold Author name email:uniq |
On the other hand, a Post will have a title (string), some content (rich text) and a reference to Author:
|
1 |
bin/rails g scaffold Post title content:rich_text author:references |
If you take a look to the output of those commands you will notice they added a helper module for each resource.
|
1 2 3 4 5 6 7 |
# Author invoke helper create app/helpers/authors_helper.rb # Post invoke helper create app/helpers/posts_helper.rb |
Here is were you would ideally write helper methods that are specific to Author and Post resources.
Now run the migrations with bin/rails db:migrate and you are ready to go.
Content creation
Now that you know how the app is set up, start your application with bin/rails server and add some content.
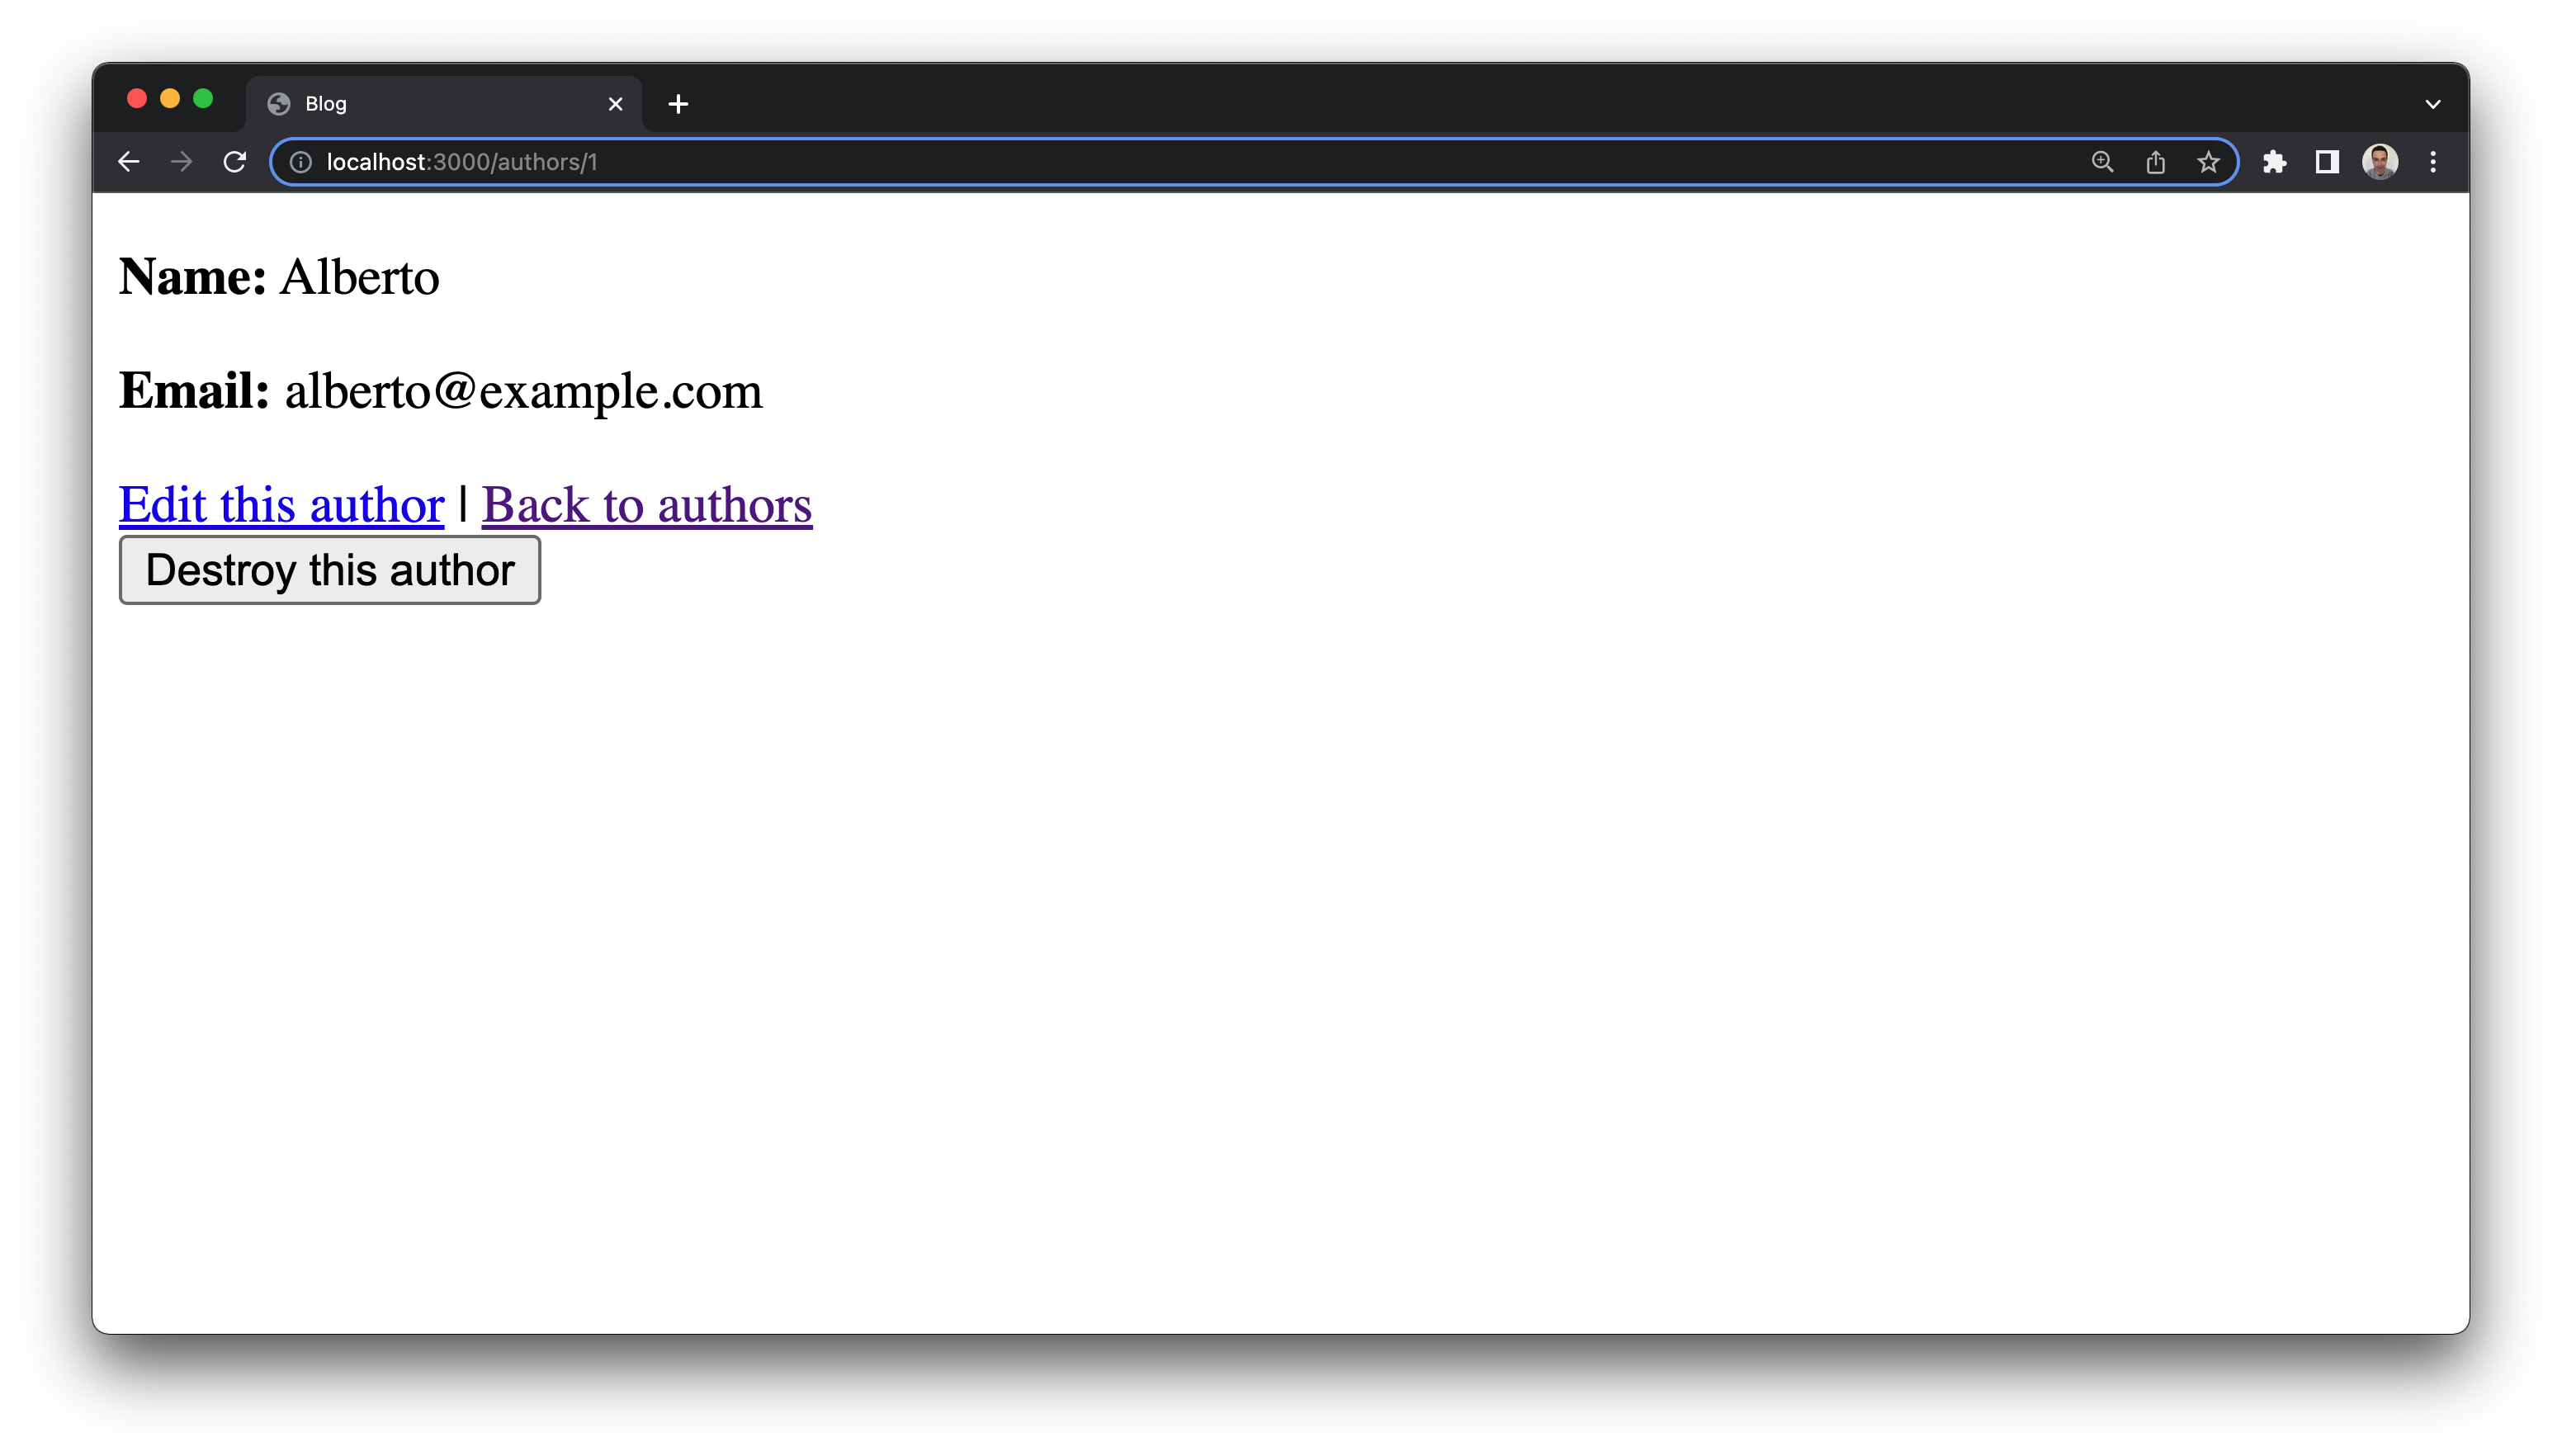
Create an Author and a Post by interacting with the web interface. In my case I have created the following author:
And the following post:
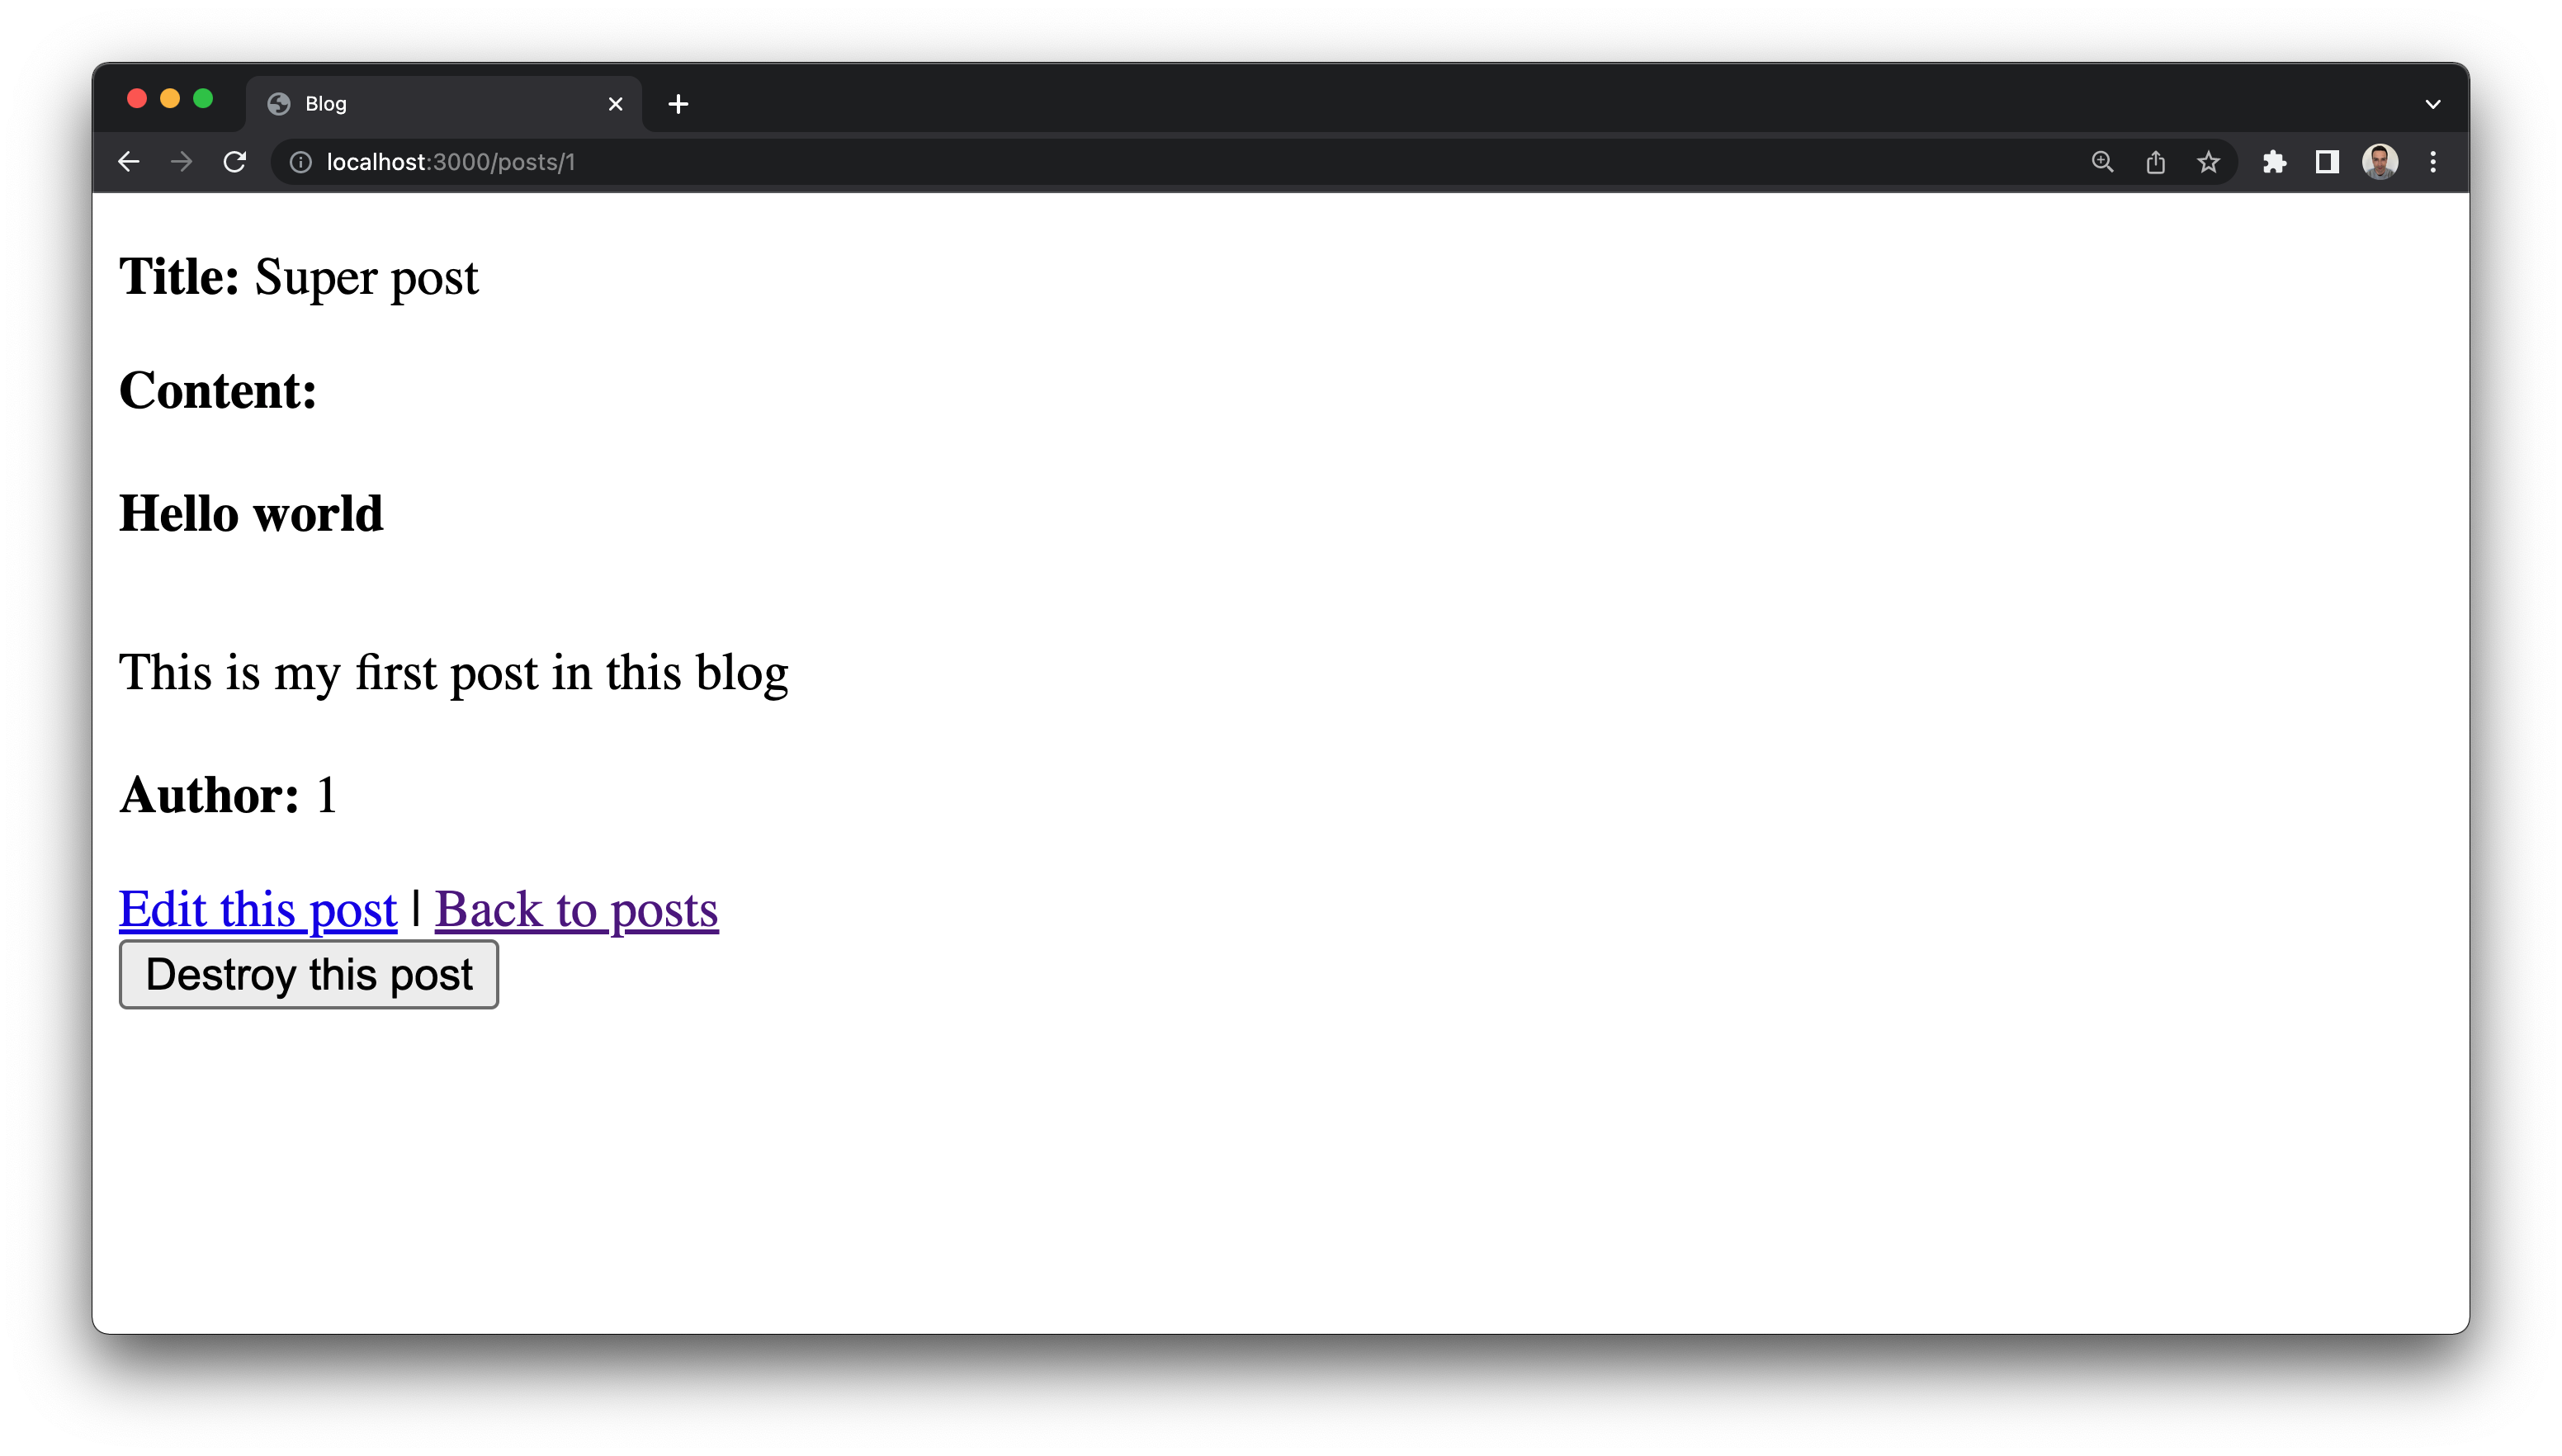
As you can notice in each picture, the default title that Rails is displaying is the name of the application. In this case Blog. This is because it is hard coded like that in the default layout file:
|
1 2 3 4 5 6 7 8 9 10 11 12 13 14 15 16 17 |
<!-- app/views/layouts/application.html.erb --> <!DOCTYPE html> <html> <head> <title>Blog</title> <meta name="viewport" content="width=device-width,initial-scale=1"> <%= csrf_meta_tags %> <%= csp_meta_tag %> <%= stylesheet_link_tag "application", "data-turbo-track": "reload" %> <%= javascript_importmap_tags %> </head> <body> <%= yield %> </body> </html> |
Adding an application wide helper
Having the name of your application as page title might not be the best for your app’s SEO interests. What if we create a helper that gives a little bit more information?
Since a page title will be displayed everywhere in our application, it seems like a perfect candidate to live inside the ApplicationHelper module. For that reason, define a page_title method within app/helpers/application_helper.rb:
|
1 2 3 4 5 |
module ApplicationHelper def page_title(title) [title.presence, 'The Rails 7 blog'].compact.join(' | ') end end |
As you can see in the code, page_title will default to The Rails 7 blog if you do not provide any title. In case you provide one, it will concatenate it to the default title, adding | as a separator..
Let’s now change the default layout code to start using your brand new helper method.
|
1 2 3 4 5 6 7 8 9 10 11 12 13 14 15 16 17 |
<!-- app/views/layouts/application.html.erb --> <!DOCTYPE html> <html> <head> <title><%= page_title(yield(:title)) %></title> <meta name="viewport" content="width=device-width,initial-scale=1"> <%= csrf_meta_tags %> <%= csp_meta_tag %> <%= stylesheet_link_tag "application", "data-turbo-track": "reload" %> <%= javascript_importmap_tags %> </head> <body> <%= yield %> </body> </html> |
Rails will now display the result of page_title instead of the previous default title. As you can see, the result of page_title will vary depending on the :title you provide to it.
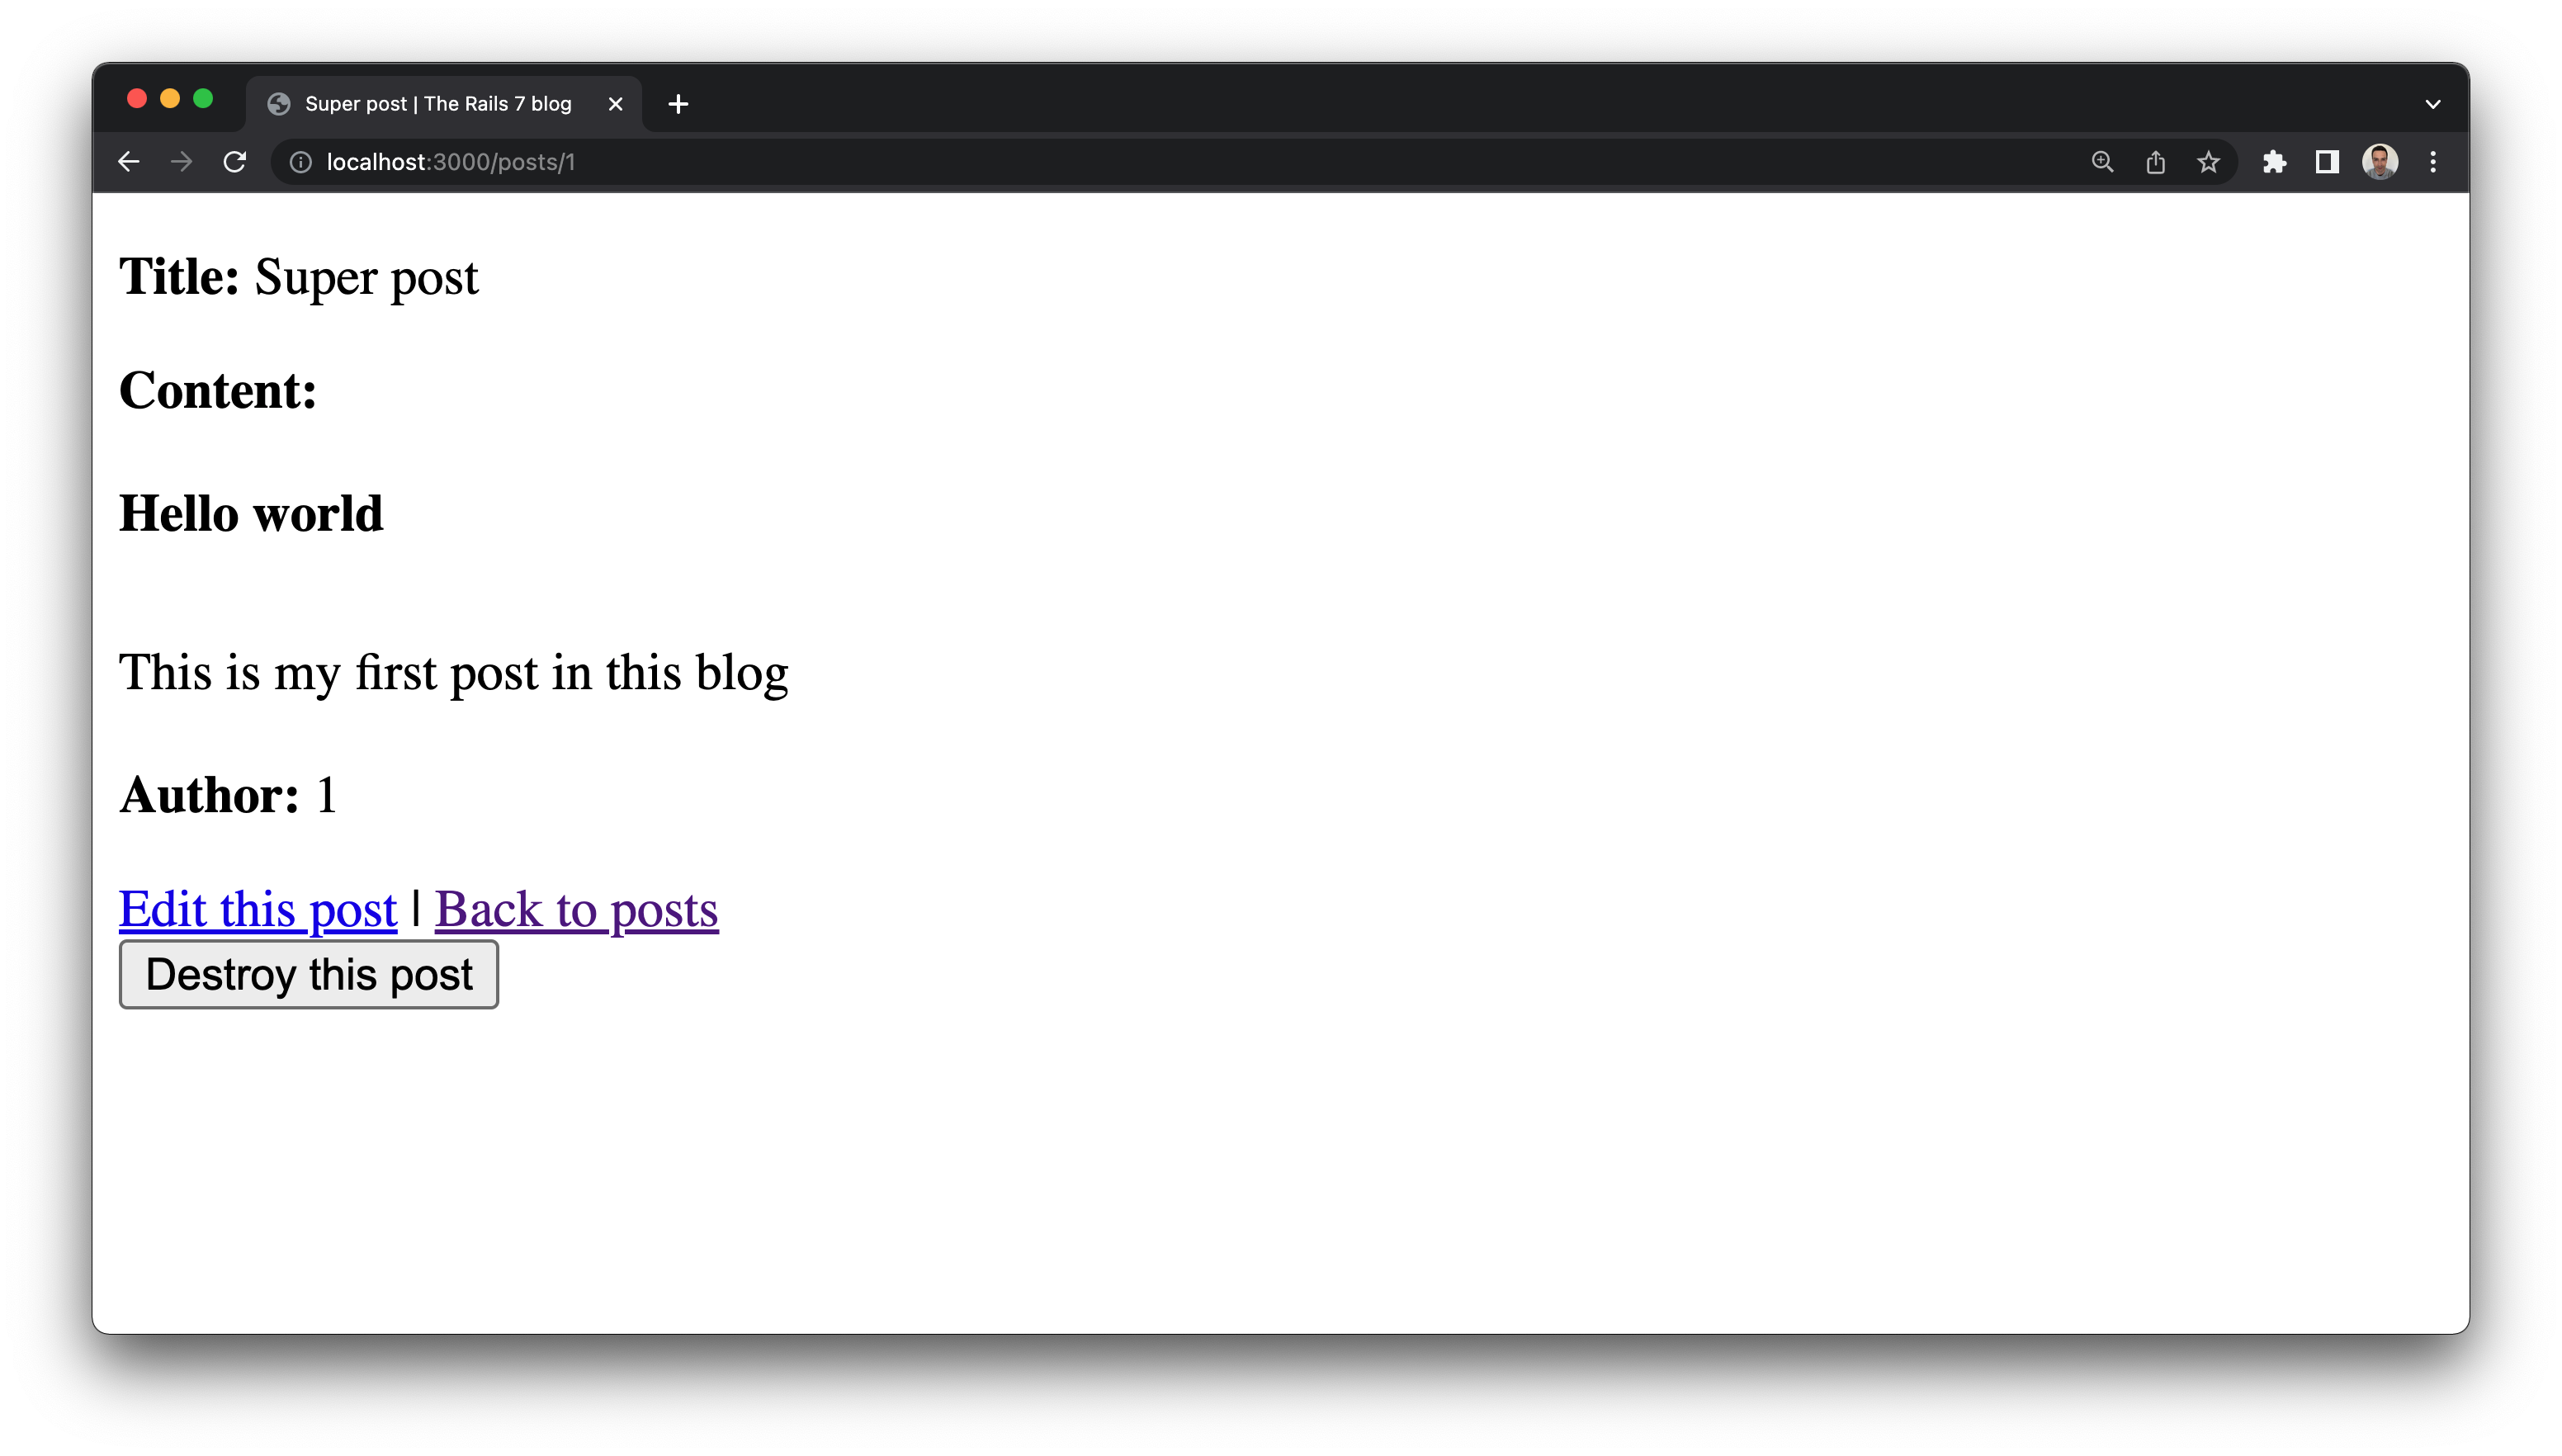
Navigate now to the post you created and hit refresh.

As you can see in the browser tab’s title, since the application does not provide any value for :title, page_title just returns The Rails 7 blog.
Since you might want the title of your posts to appear also in the page’s title to enhance SEO, let’s provide it there.
Inside Post’s show template, use provide(:title, @post.title) to provide the post’s title. Like this:
|
1 2 3 4 5 6 7 8 9 10 11 12 13 14 |
<!-- app/views/posts/show.html.erb --> <% provide(:title, @post.title) %> <p style="color: green"><%= notice %></p> <%= render @post %> <div> <%= link_to "Edit this post", edit_post_path(@post) %> | <%= link_to "Back to posts", posts_path %> <%= button_to "Destroy this post", @post, method: :delete %> </div> |
Now if you refresh the page you should see the post title within the page title. You should be able to see it in the browser tab. In my example: Super Post | The Rails 7 blog.
Congratulations! You have created your first helper! 🙌 Pat yourself on the back and get ready for the next one.
Do not fall into this mistake
As you can see on the picture above the way the author is displayed does not say a lot of information to us. Let’s improve it.
A simple improvement would be to just display the author’s name or email. In this case we will display both. Time for another helper!
WARNING: In code review I have seen people adding this to the Author model. In my opinion this is not correct since the model should not contain view logic. The place for this formatting logic should be in the view or within a helper module. Since the helper method is related to authors, the helper module that will contain it will be AuthorsHelper. Add this to your AuthorsHelper.
|
1 2 3 4 5 6 |
module AuthorsHelper def pretty_print_author(author) "#{author.name} <#{author.email}>" end end |
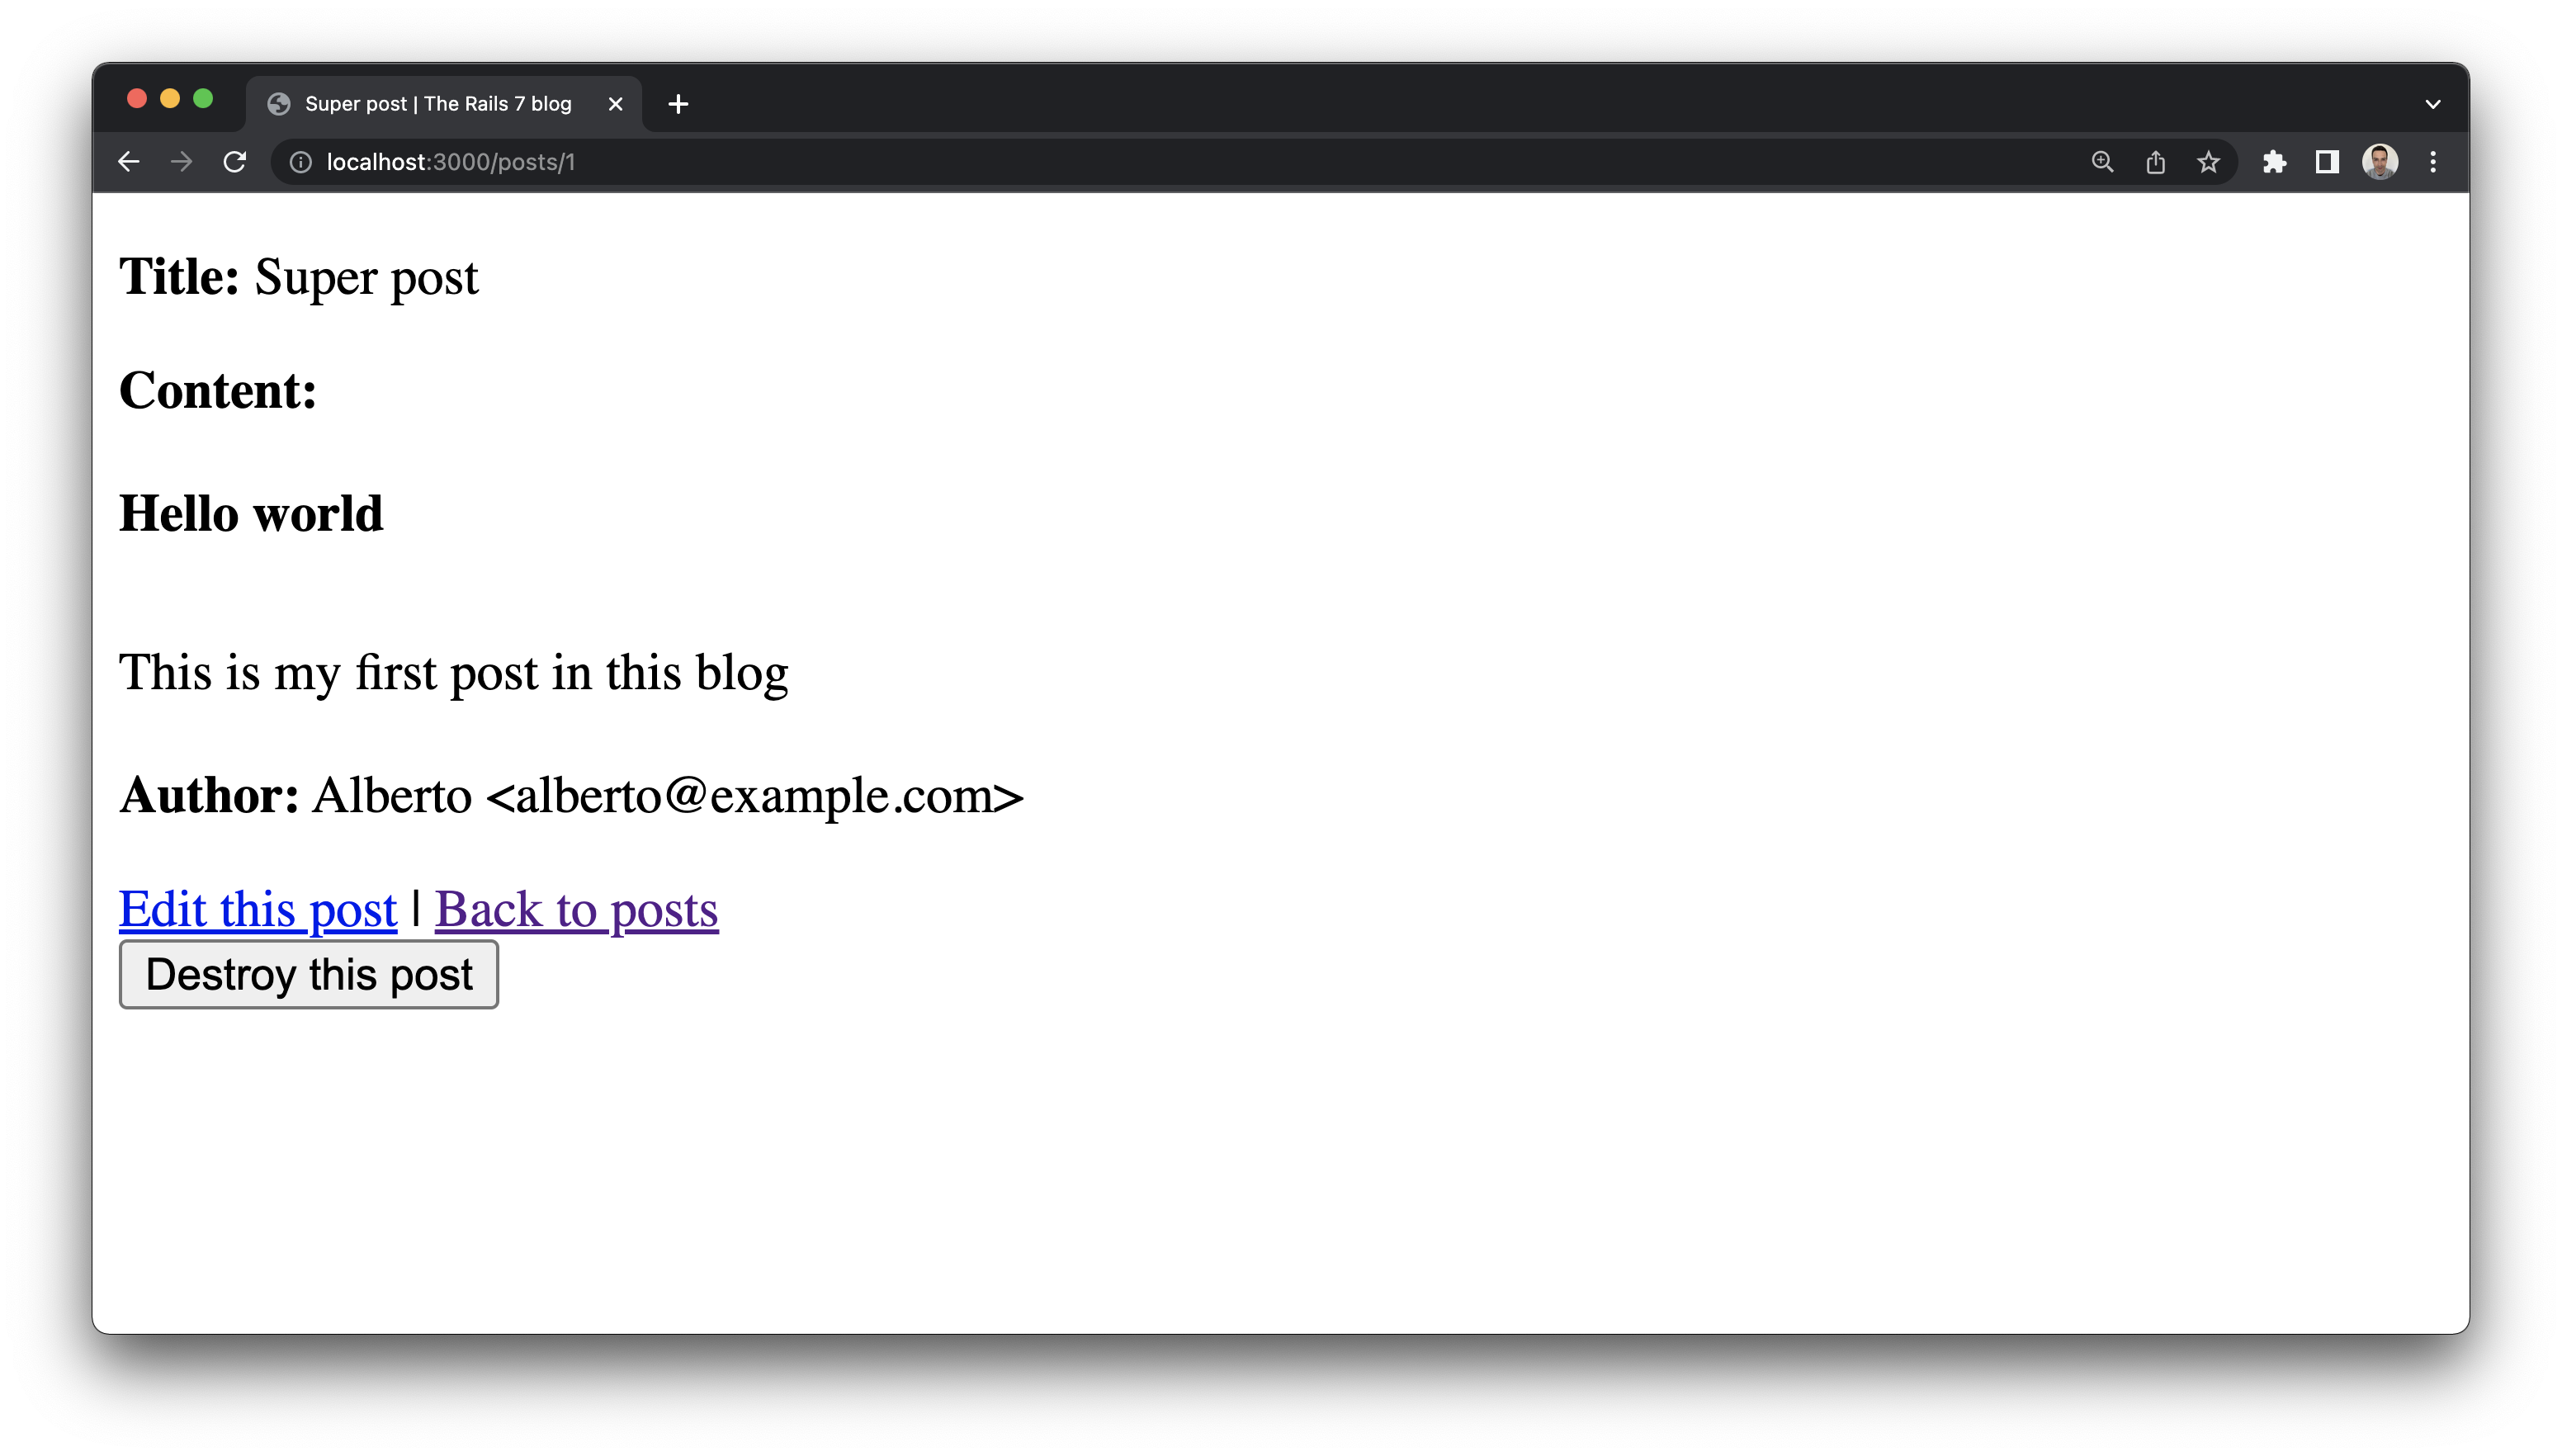
Now, let’s open again the Post partial and change <%= post.author_id %> with the helper you just created:
|
1 2 3 4 5 6 7 8 9 10 11 12 13 14 15 16 17 18 19 |
<!-- app/views/posts/_post.html.erb --> <div id="<%= dom_id post %>"> <p> <strong>Title:</strong> <%= post.title %> </p> <p> <strong>Content:</strong> <%= post.content %> </p> <p> <strong>Author:</strong> <%= pretty_print_author(post.author) %> </p> </div> |
Reload the post show page in your browser and the author should now appear pretty printed.
And that is basically it!
If you enjoyed this post, do not forget to subscribe so that you do not miss any future updates. If you want me to write about something in particular, please let me know in the comment section below.
See you in my next post! Adiós!